Running Rails on AWS Elastic Beanstalk (Migrating from Heroku to AWS)
![]()
I’ve been building a project and trying to get my first users. After building the MVP I needed to host it somewhere. Initially I used Heroku’s free plan, which is free and super easy to setup. However, this plan is not suitable for production applications because it must sleep for some time each month. To run the app in production I would have to upgrade to the Hobby ($7) or Standard ($25+) plan. It’s not a lot of money but I want my app to be as low cost as possible so I decided to move to AWS Elastic Beanstalk. Amazon offer 1 year free on many services, this gives me time to try to generate revenue from my app.
This blog post is a technical guide to deploying a Rails application on AWS Elastic Beanstalk.
1. Installing the Elastic Beanstalk CLI
My first step was to install the Elastic Beanstalk command line tool. Mac users can install the CLI via homebrew:
$ brew update
$ brew install aws-elasticbeanstalk
2. Setup a profile for AWS ID and Secret (optional)
Next, I setup an AWS profile with a new aws_access_key_id & aws_secret_access_key. My reason for moving to Elastic Beanstalk was to cut down hosting costs. To achieve that, I created a new AWS account, to get 1 year free. I then setup a profile in order to tell the CLI tool to use the new account. To create a profile, I added a new section to my ~/.aws/credentials file:
[default]
aws_access_key_id = example_key1
aws_secret_access_key = example_key2

[pullrequestwebhooks]
aws_access_key_id= example_key3
aws_secret_access_key= example_key4
3. Initializing the Elastic Beanstalk CLI tool
The first step to running the Elastic Beanstalk (EB) CLI tool is to initialise the EB application, within the current directory. To do that, I ran the EB init command inside my application’s directory and answered the question prompts:
$ eb init

Select a default region
1) us-east-1 : US East (N. Virginia)
2) us-west-1 : US West (N. California)
3) us-west-2 : US West (Oregon)
4) eu-west-1 : EU (Ireland)
5) eu-central-1 : EU (Frankfurt)
6) ap-south-1 : Asia Pacific (Mumbai)
7) ap-southeast-1 : Asia Pacific (Singapore)
8) ap-southeast-2 : Asia Pacific (Sydney)
9) ap-northeast-1 : Asia Pacific (Tokyo)
10) ap-northeast-2 : Asia Pacific (Seoul)
11) sa-east-1 : South America (Sao Paulo)
12) cn-north-1 : China (Beijing)
13) cn-northwest-1 : China (Ningxia)
14) us-east-2 : US East (Ohio)
15) ca-central-1 : Canada (Central)
16) eu-west-2 : EU (London)
17) eu-west-3 : EU (Paris)
(default is 3): 16

Select an application to use
1) [ Create new Application ]
(default is 1): 1

Enter Application Name
(default is “blah-blah"):
Application blah-blah has been created.

It appears you are using Ruby. Is this correct?
(y/n): y

Select a platform version.
1) Ruby 2.5 (Puma)
2) Ruby 2.5 (Passenger Standalone)
3) Ruby 2.4 (Puma)
4) Ruby 2.4 (Passenger Standalone)
5) Ruby 2.3 (Puma)
6) Ruby 2.3 (Passenger Standalone)
7) Ruby 2.2 (Puma)
8) Ruby 2.2 (Passenger Standalone)
9) Ruby 2.1 (Puma)
10) Ruby 2.1 (Passenger Standalone)
11) Ruby 2.0 (Puma)
12) Ruby 2.0 (Passenger Standalone)
13) Ruby 1.9.3
(default is 1): 1

Cannot setup CodeCommit because there is no Source Control setup, continuing with initialization
Do you want to set up SSH for your instances?
(Y/n): n
This will create a .elasticbeanstalk/config.yml file to store the EB settings.
4. Create EB application
After the EB CLI had been configured for the project, I used it to create an application in Elastic Beanstalk. In my case, my application is a Rails app with a Postgres database. The command I used to create my application was:
$ eb create production -db.engine postgres
The default DB is MySQL so I need to override it because I’m using Postgres. The eb create command has lots of options for overriding defaults, a full list can be found on the AWS docs.
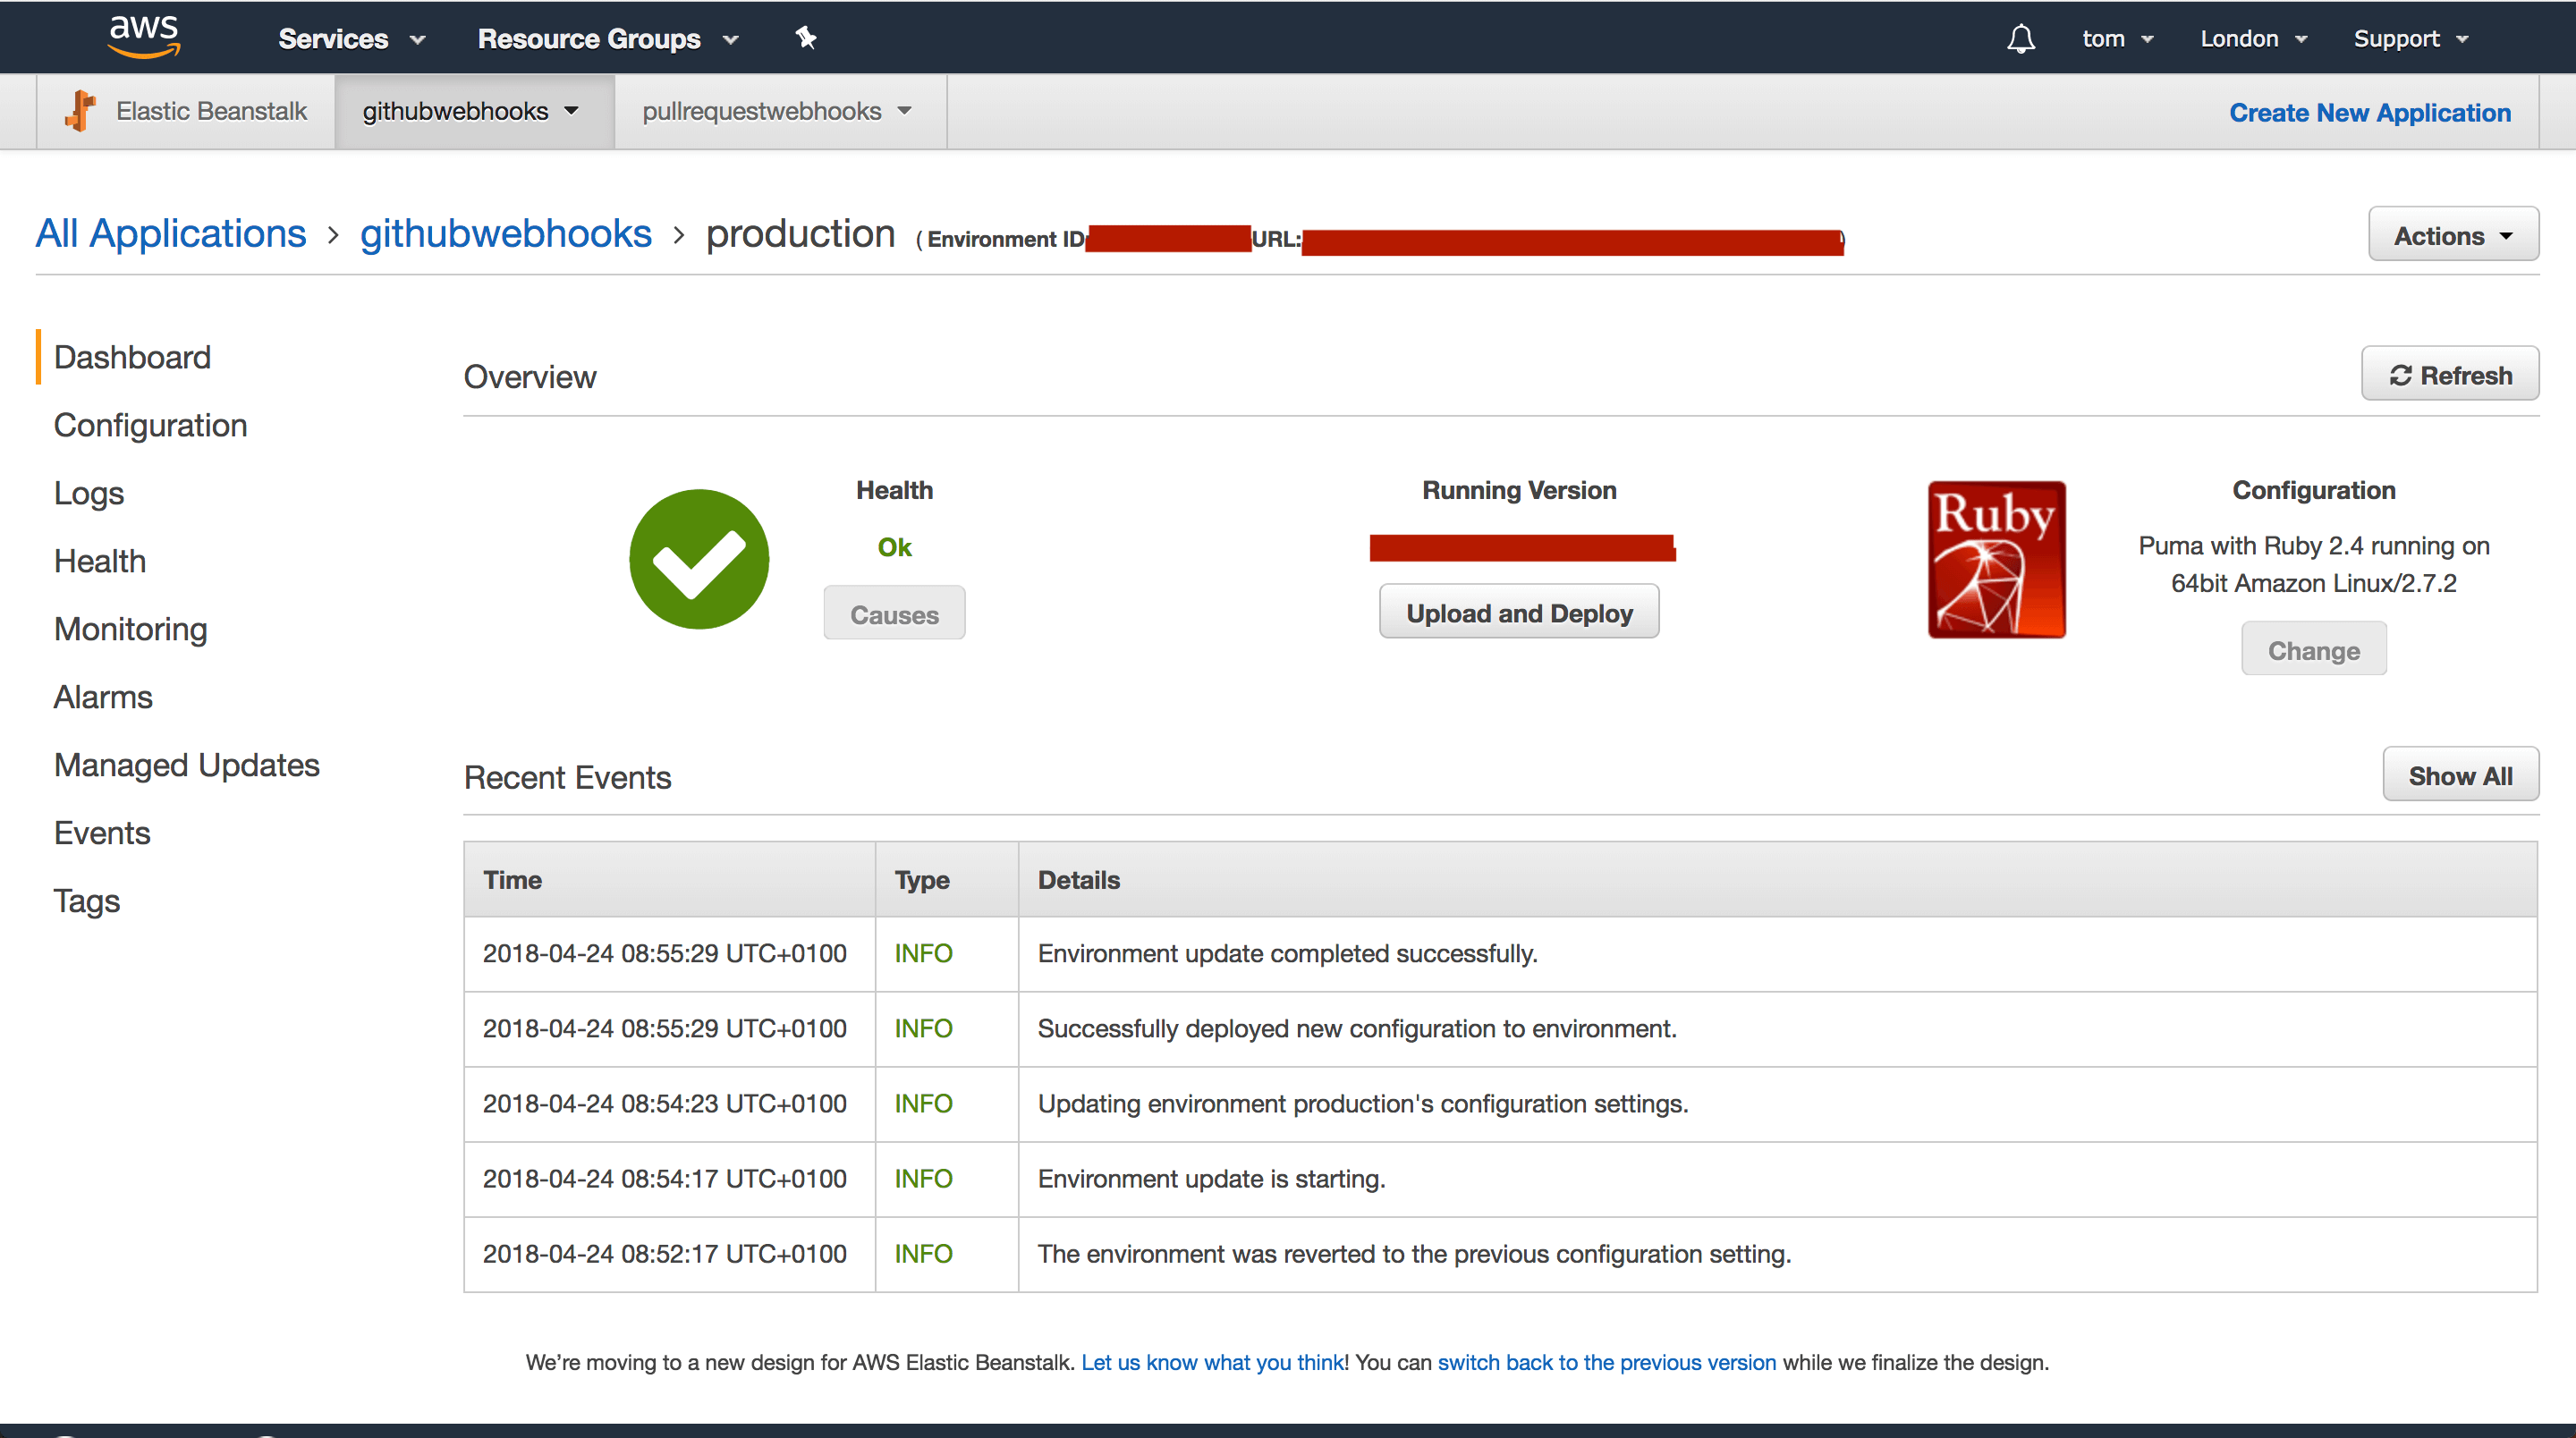
This command takes some time because it is configuring loadbalancers, security groups, an EC2 server and more. Once it finished, I ran eb status to view the running application.
Environment details for: production
  Application name: githubwebhooks
  Region: eu-west-2
  Deployed Version: app-555a-123456_1234568
  Environment ID: e-abcdefgh
  Platform: arn:aws:elasticbeanstalk:eu-west-2::platform/Puma with Ruby 2.4 running on 64bit Amazon Linux/2.7.2
  Tier: WebServer-Standard-1.0
  CNAME: production.abcdefghi.eu-west-2.elasticbeanstalk.com
  Updated: 2018-04-24 08:51:29.171000+00:00
  Status: Ready
  Health: Green
I was also able to view it in the browser.
At this point I tried to browse to the url of my Elastic Beanstalk application but was greeted with an error. Each application is different but here are the steps I worked through to get my application running:
5. Set SECRET_KEY_BASE
First I set an environment variable for SECRET_KEY_BASE:
$ eb setenv SECRET_KEY_BASE=$(rails secret)
6. Installing native packages with .ebextensions
In my project I use the ffi gem, which requires native packages. To get this to work with EB I created a .ebextensions directory with a run.config file inside it (the configuration file can have any name, as long as it ends with .config). The file looks like this:
packages:
    yum:
        libffi-devel: []
7. Configuring the database
At this point my application was still producing an error. To debug I needed to view the logs, I did that via the EB CLI tool:
$ eb logs --profile pullrequestwebhooks
The logs told me that Rails couldn’t connect to a database. This made sense because I hadn’t configured my database.yml file. The EB docs explain how to configure a database connection, here are the docs for a Rails project. I updated my database.yml as follows:
production:
  adapter: postgresql
  encoding: unicode
  database: <%= ENV['RDS_DB_NAME'] %>
  username: <%= ENV['RDS_USERNAME'] %>
  password: <%= ENV['RDS_PASSWORD'] %>
  host: <%= ENV['RDS_HOSTNAME'] %>
  port: <%= ENV['RDS_PORT'] %>
At this point my application was up and running, you may have some more environment variables that need to be added to EB but the logs should reveal that.
8. Custom Domain
This will be a production app so I wanted a custom domain. You can buy domain names externally and import them into AWS but I found it very easy to get my domain name straight from Amazon.
To register a domain name with AWS, follow Step 2 in the AWS ‘get a domain’ docs. Then follow step 3 of the documentation to configure the DNS for your application. For EB you should read the ‘Fully Qualified Domain Name (FQDN)’ part of the documentation.
9. SSL
My application allows users to create accounts and in the future I hope to take payments so SSL is important. With Heroku, I got SSL out of the box but with EB I had to configure it manually.
First, I created a SSL certificate. To do that, follow the AWS ‘Request a Public Certificate’ documentation.
Next, I verified the SSL certificate by adding the CNAME record to Route53. To do that, follow the AWS ‘Use DNS to Validate Domain Ownership’ documentation
Lastly, I added a listener to tell port 443 traffic to use the new SSL cert. To do that, go to the AWS console and navigate to Elastic Beanstalk. Go to configuration on the left hand side menu. Then click ‘Add Listener’. Configure your listener as follows:
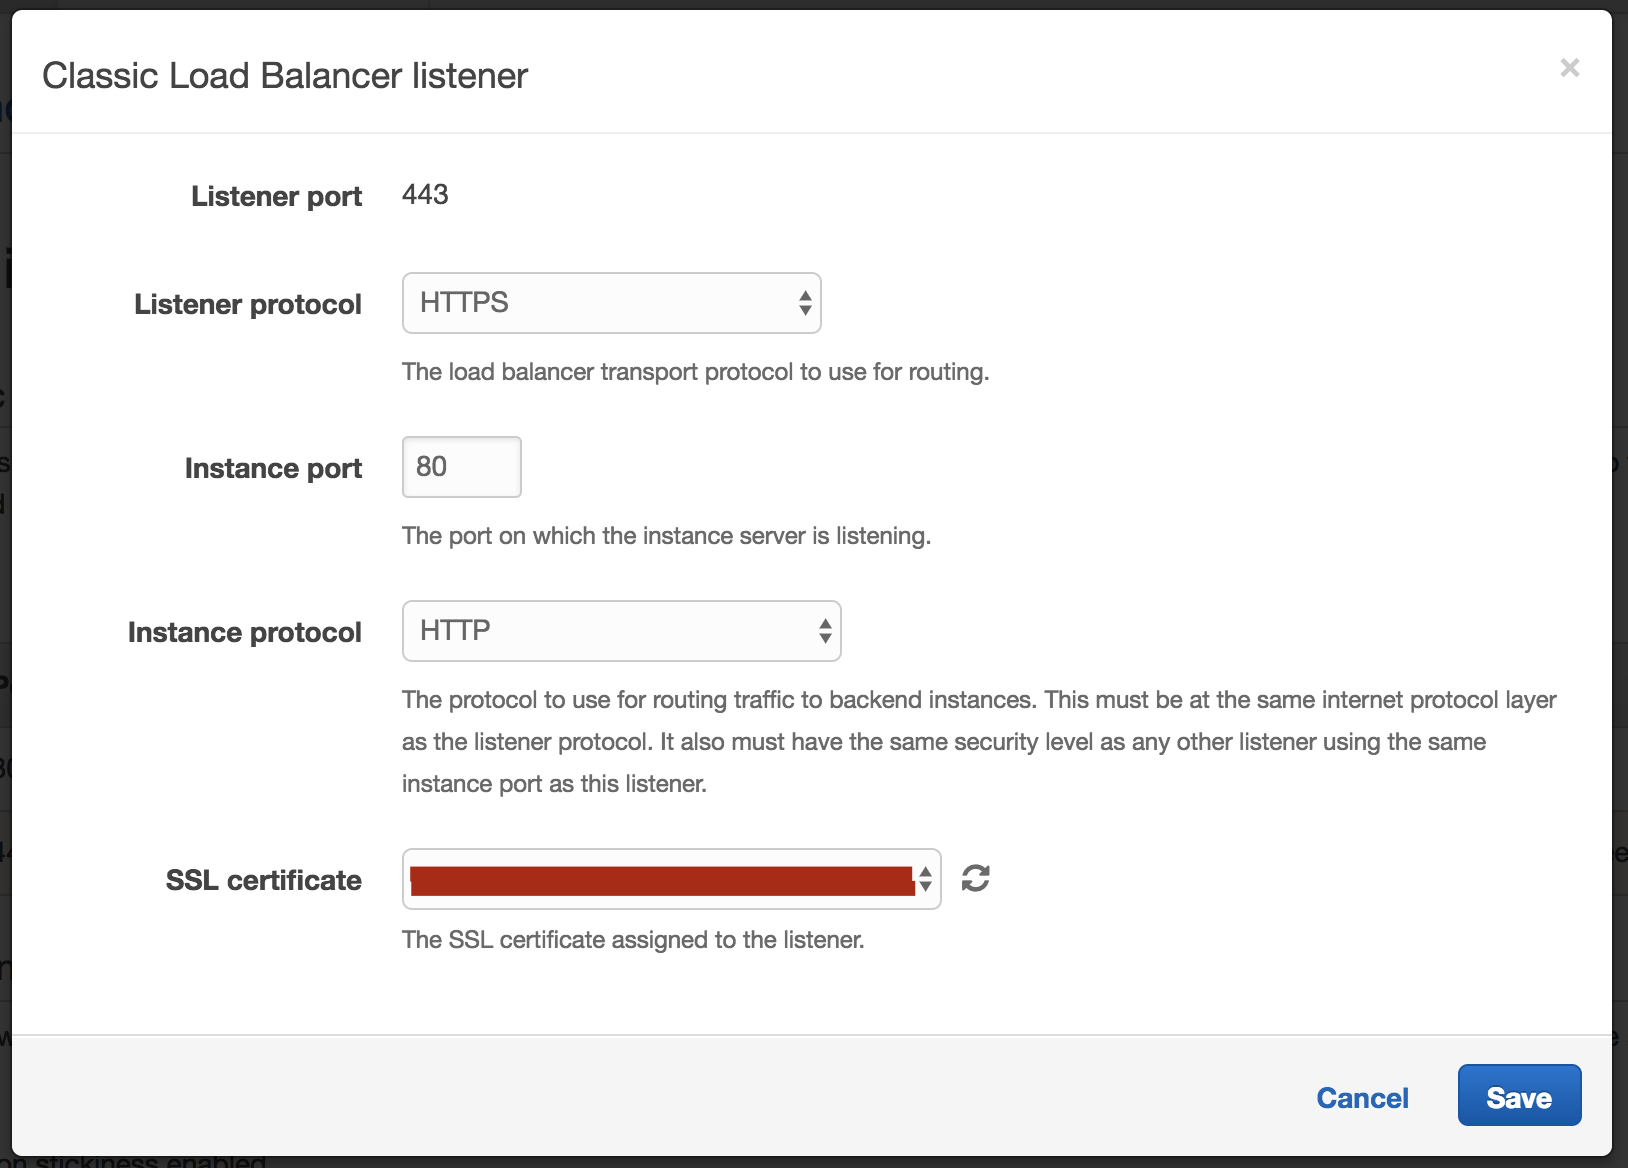
Click save. Then click ‘Apply’ on the main configuration page (be sure to do this, otherwise your changes won’t be applied).
My thoughts
It took a bit more work to setup my application with EB, than it would have taken with Heroku but I’m happy with the results. With the free tier, AWS will be much cheaper. Even beyond the first free year, AWS is cheaper and more flexible.